

Introduction to Staircase Photo Displays
How to Arrange Photos on Staircase Walls. Staircases, often seen merely as functional parts of a home, hold vast potential for artistic expression. Transforming these transitional spaces into galleries, staircase photo displays offer a dynamic way to showcase personal memories and artistic photographs. Thoughtfully arranging photos along a staircase wall not only maximises the visual appeal of a home but also creates an engaging narrative for both residents and visitors alike. This section explores the nuances of designing a staircase photo display for maximum impact, considering composition, frame selection, thematic cohesion, and lighting, essential for creating an enchanting visual journey with each step.
Understanding the Visual Dynamics of Staircases
The visual dynamics of staircases involve the interplay of vertical and horizontal lines, the rhythm of stair risers and treads, and the alternating pattern of light and shade. When arranging photos on staircase walls, one must consider:
-
Lines and angles: Staircases naturally draw the eye upwards, following the lines of the steps and the handrail. Photos should complement these lines, not compete with them.
-
Spacing and alignment: The spacing between frames should be consistent, aligning either with the rise of each step or maintaining a linear path parallel to the incline.
-
Scale and proportion: The size of the photographs should correspond to the wall space available, ensuring they are neither too overwhelming nor too diminutive.
-
Lighting: Attention to the natural and artificial lighting can enhance the staircase’s ambiance, highlighting the displayed photos effectively.
In essence, the arrangement must harmonise with the architectural elements while enhancing the staircase's aesthetic appeal.
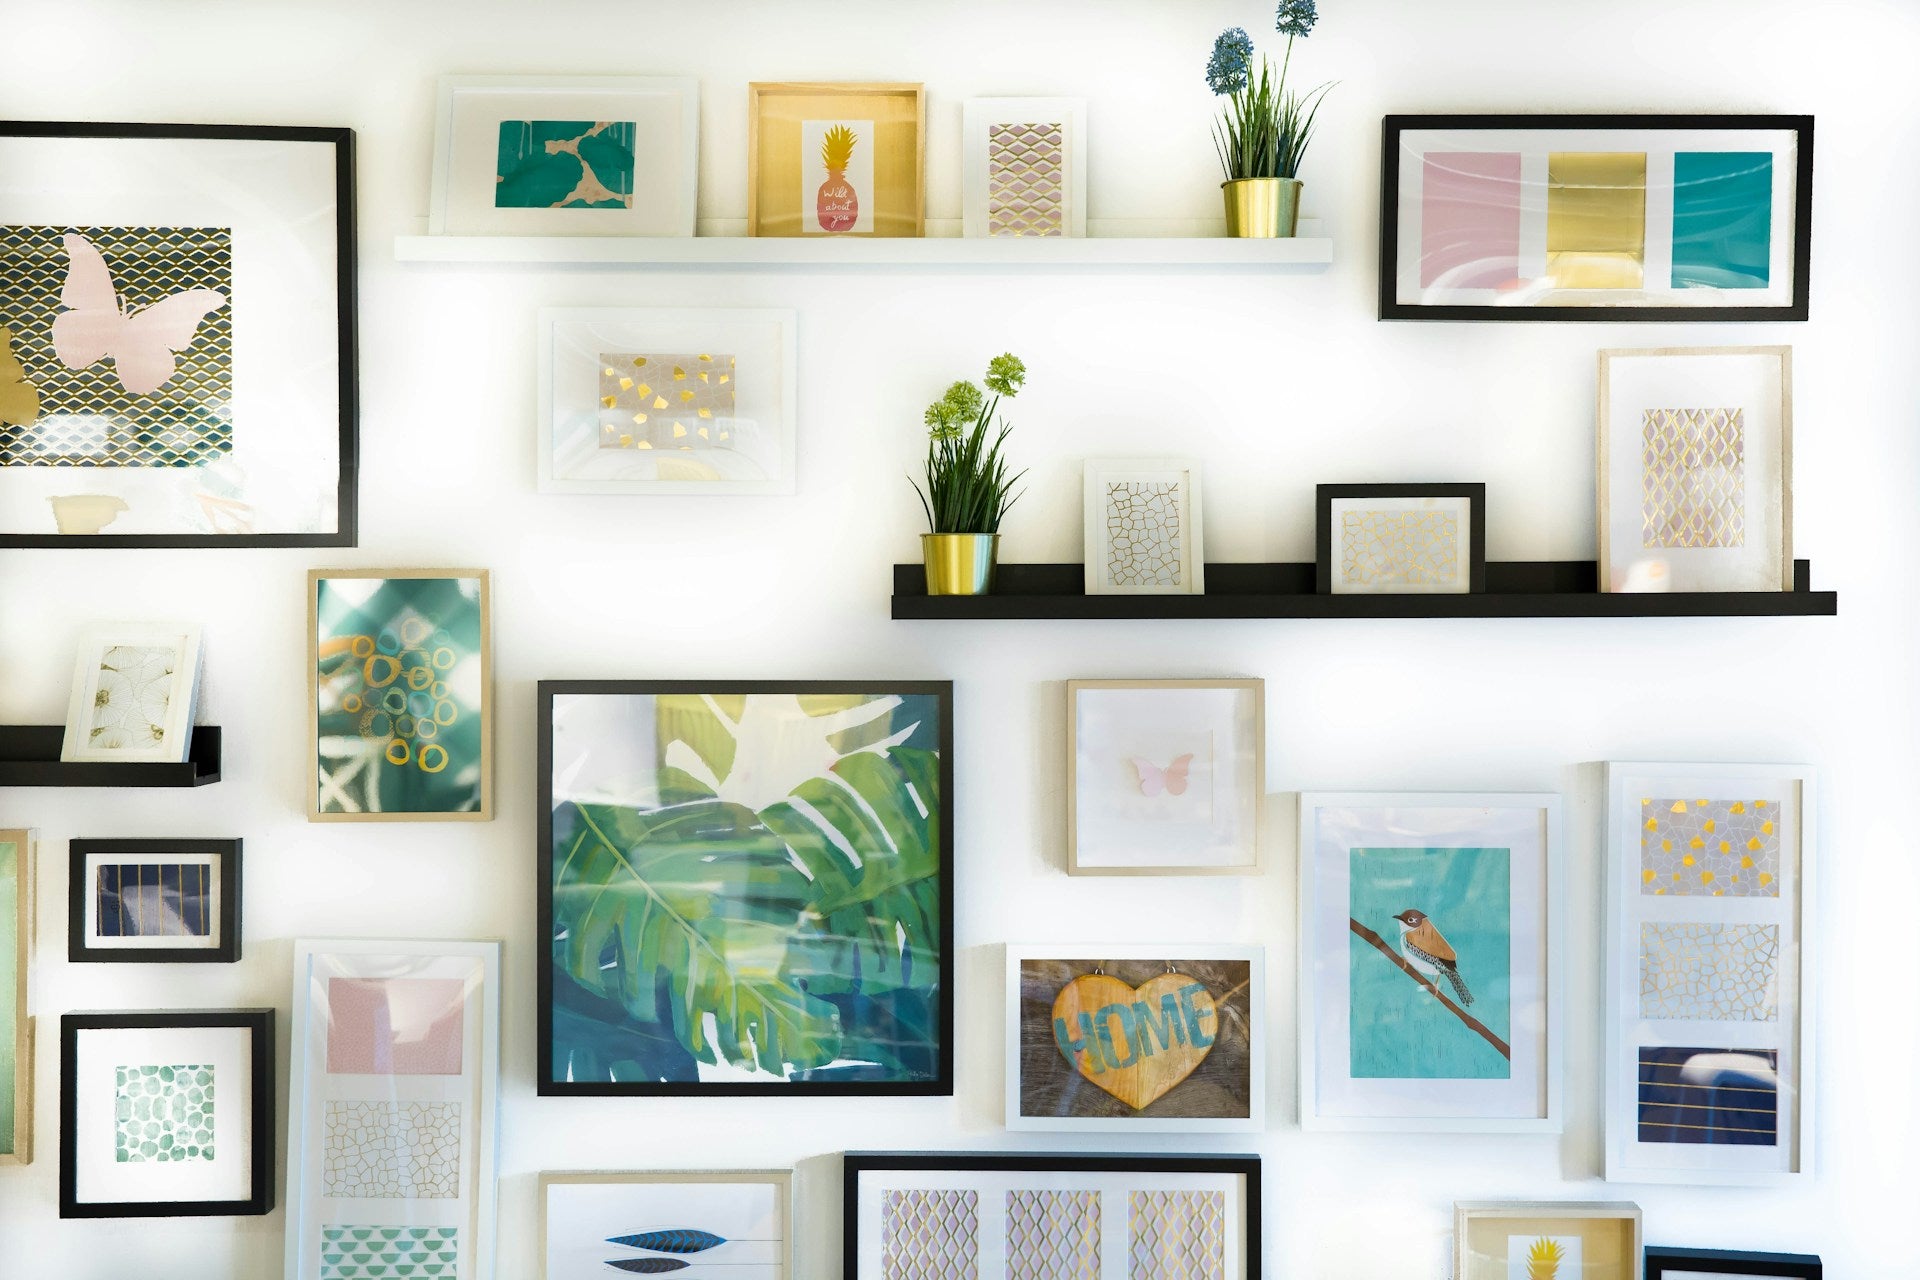
Choosing the Right Frames for Cohesion
When selecting frames for a staircase gallery, consistency is key to creating cohesion. Homeowners should:
-
Consider frame colour and finish; opting for a single hue or complementary shades to unite the display.
-
Select frames of similar thickness and style to impart a sense of uniformity.
-
Vary frame sizes for visual interest, ensuring they still conform to the overall aesthetic.
-
Choose matting that aligns in colour and texture across different photos to enhance the cohesive look.
-
Contemplate the use of a single type of glass, such as non-reflective or standard, across all frames to ensure consistency in appearance under varying lighting conditions.
Harmony in frame selection fortifies the visual narrative of the staircase gallery, making it a compelling feature in any home.
A great option for creating a staircase gallery wall is with photo tiles. You could either use solely photo tiles or use a selection of them mixed with frames of different sizes.
The Importance of Theming Your Photo Collection
Theming a photo collection lends coherence and a visually pleasing flow to staircase wall displays. By uniting images through a common motif, colour scheme, era or subject, homeowners create a narrative that draws viewers in and leads them upward in a journey. Such curation ensures that personal or artistic statements are not lost amidst a haphazard array of snapshots but are thoughtfully presented. Moreover, a well-executed theme enhances the aesthetics of the stairwell, complementing the overall decor and architecture of the home. When theming, the thoughtfully arranged collection becomes more than just individual pictures—it transforms into a cohesive gallery that elevates the space.
Balancing Photo Arrangements for Eye Movement
Creating a visually appealing photo display on staircase walls involves understanding how the eye moves. A balanced arrangement keeps the viewer engaged, guiding the eye up and down the stairs seamlessly. When arranging photos, consider these points:
-
Vary Frame Sizes: Mix different frame sizes to create interest but maintain a consistent spacing between each to provide visual continuity.
-
Align Frames Thoughtfully: Align either the tops, bottoms, or centres of frames to form a straight line or smooth wave pattern that the eye can easily follow.
-
Create a Focal Point: Choose a larger or more colourful piece as an anchor. Position it at eye level to draw attention and define the starting point of your arrangement.
-
Echo the Staircase Angle: Mimic the staircase's angle with your photo arrangement to create harmony and encourage the eye to travel upwards.
-
Use Consistent Themes: Whether through colour, subject matter, or frame style, consistency can help lead the eye through the display without jarring interruptions.
Strategies for Mixing Photo Sizes and Orientations
When figuring out how to arrange photos on staircase walls, the blend of different sizes and orientations can create a dynamic and engaging display. To achieve this:
-
Balance is Key: Start with larger, anchor pieces and distribute them evenly. Then fill in with smaller photos to maintain visual balance.
-
Orientation Variety: Mix portrait and landscape orientations to add interest. Align the tops, bottoms, or centres of frames for a cohesive look despite differing orientations.
-
Consistent Spacing: Keep a consistent spacing between frames, typically 2-3 inches, to unite the collection.
-
Complementary Frames: Use frames that complement each other, even if they are not matching. This ties together diverse photo sizes and orientations.
-
Unified Theme: Consider a common element, such as black and white photography or family portraits, to harmonise the arrangement.
By thoughtfully combining various photo dimensions and orientations, one can create an aesthetically pleasing and personalised staircase gallery.
Lighting and Accessibility Considerations
When arranging photos on staircase walls, lighting plays a crucial role in ensuring the display is visible and engaging. Opt for:
-
Even Lighting: Use balanced lighting to avoid casting shadows and to evenly highlight each photo.
-
Adjustable Fixtures: Install track lights or wall-mounted sconces with adjustable heads to direct light precisely.
Accessibility must also be a priority:
-
Height Arrangements: Place photos at eye level for an average person on each step, creating a cohesive visual flow.
-
Secure Mounting: Ensure all frames are securely mounted to withstand frequent foot traffic, protecting both art and viewers.
How to Arrange Photos on Staircase Walls - A Step-by-Step Guide to Arranging Your Photos
-
Select a Theme: Decide on a cohesive theme to bring uniformity to your photo display. This could be based on colour, subject matter, or frame style.
-
Gather Your Materials: Before starting, ensure you have all necessary tools and materials such as frames, a hammer, nails, a level, and possibly a laser line.
-
Measure Your Space: Use a tape measure to assess the wall space available on your staircase. Record these measurements; they will guide the spacing between photographs.
-
Lay Out the Design: Arrange your photos on the floor. Mimic the staircase's incline for a more accurate layout. Adjust the spacing until you achieve a harmonious arrangement.
-
Mark the Wall: Once satisfied with the layout, use pencil marks or painter's tape to outline where each frame will hang. Ensure they’re level and evenly spaced.
-
Begin Hanging: Start at the most central point and work outwards, hanging your photos. Use the level to ensure each frame is straight.
-
Final Adjustments: Step back to review your work, making any necessary adjustments. Once all photos are level and at the desired height and spacing, your staircase photo arrangement is complete.
Maintenance and Upkeep of Your Staircase Gallery
Maintaining your staircase gallery is crucial to ensure its longevity and visual appeal. Regular dusting of frames and glass will keep your photographs looking pristine. Use a microfibre cloth and appropriate glass cleaner for smudge-free results. Examine hangings periodically to confirm their stability, and tighten any hardware as needed to prevent accidents. Limit direct sunlight exposure to fend off fading and discolouration. Additionally, consider rotating your photographs occasionally; this not only protects them from consistent light exposure but also refreshes the overall look of your staircase gallery, keeping it dynamic and engaging.
Conclusion: Enjoying Your New Artistic Statement
With the photographs meticulously arranged on your staircase walls, step back and admire the transformative power of visual storytelling. The care in selection and placement not only maximises the impact of your cherished moments but also elevates the aesthetic appeal of your home. As you ascend or descend your staircase, let the fluid narrative of images invite reflection and appreciation. These walls, once mere passageways, are now a celebration of memories—a personal gallery to be enjoyed daily. Your staircase has become a testament to the harmony between form and function, a space where beauty steps in stride with life's rhythm.
Visit our vast selection of framed photo prints with a huge choice of sizes, styles and different aspect ratios to give you inspiration on how to arrange photos on staircase walls.
